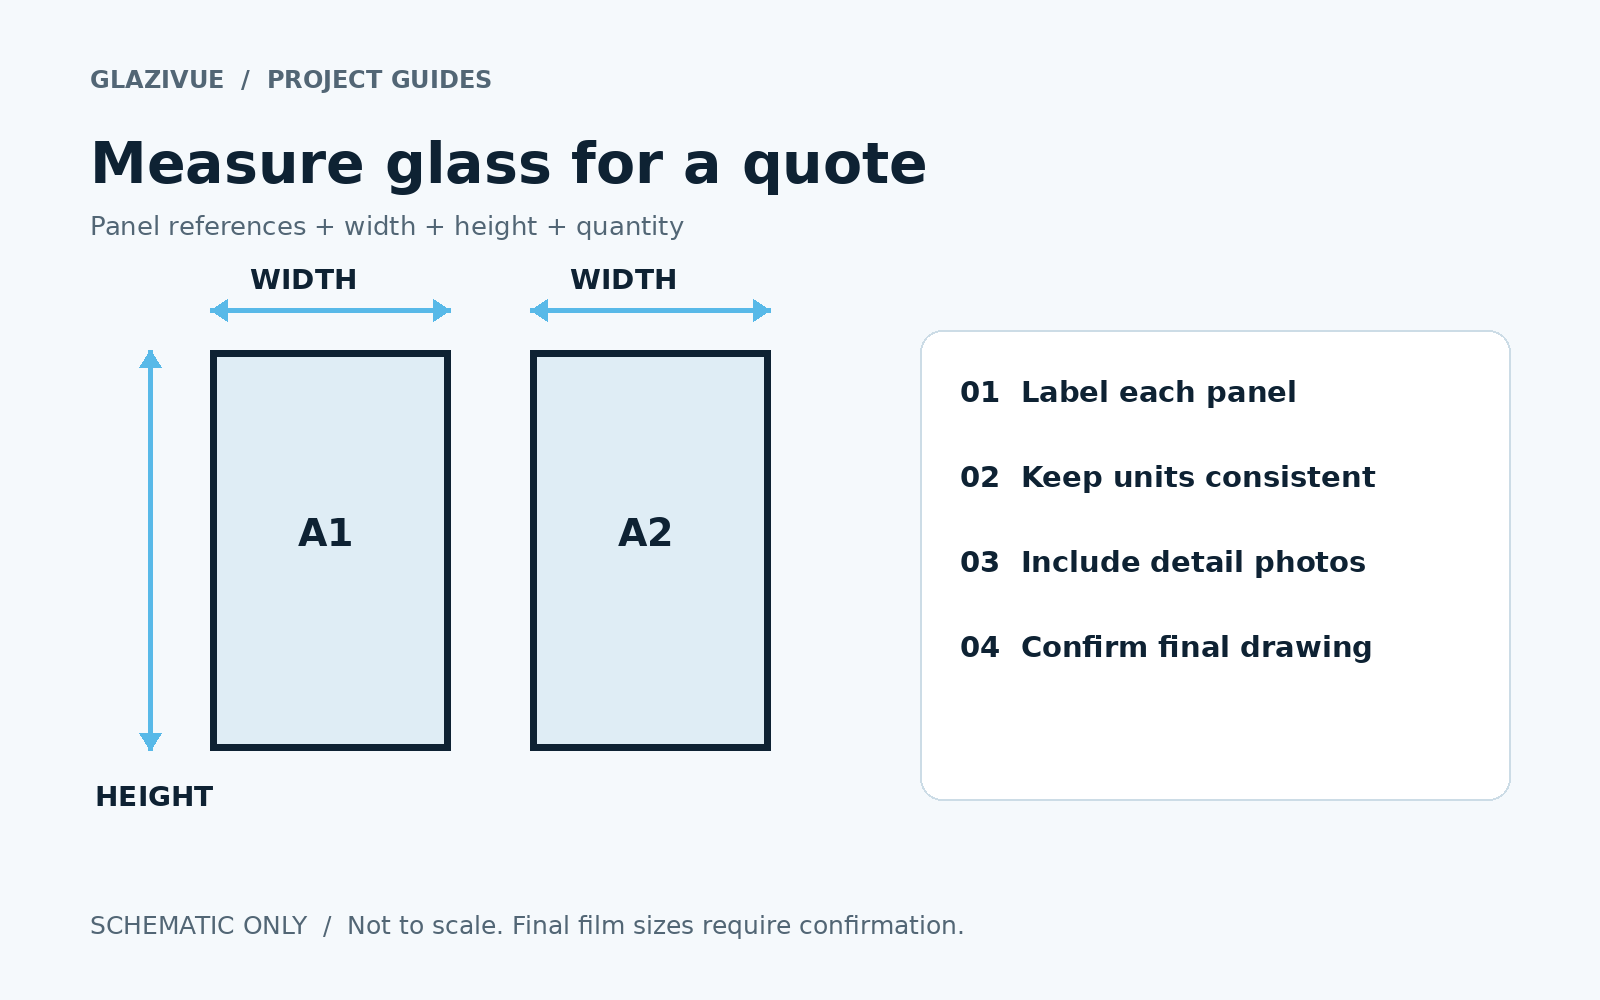
To measure glass for a smart film quote, record the width and height of each glass panel, label the panels on a photo or sketch, and list how many pieces you need. State your measurement units and explain whether the dimensions describe visible glass or the intended film coverage. This gives a supplier much more useful information than a total area alone.
This guide covers preliminary quotation information for existing office partitions and meeting-room glass. Quotation measurements are not automatically approved production dimensions. Final film sizes, edge details and electrical connections must be agreed before the order is released.
1. Identify the glass and the product format
Start by explaining whether you want self-adhesive PDLC smart film applied to existing glass or a film intended for a laminated-glass assembly. These routes involve different deliverables and preparation. Browse the GlaziVue product formats before preparing your request.
For an existing partition, photograph the complete wall and note which panels are fixed and which are doors. Include visible frames, seals, handles and hinges. If you are replacing glazing rather than applying film, provide the available drawings and identify the party responsible for the glass assembly.
2. Give every panel a unique reference
Use simple labels such as A1, A2 and D1. Put the same references on your sketch, photographs and dimension schedule. A clear panel reference prevents a door measurement being confused with an adjacent fixed panel.
Record repeated panels separately until their dimensions have been checked. Glass that looks identical may vary. Mark any panel that has not yet been measured as an estimate rather than copying the dimensions of its neighbor.
3. Record width and height consistently
For a preliminary retrofit request, record the accessible visible glass area where the film is intended to go. Measure the glass surface rather than the outside of the surrounding frame. Label width and height explicitly and keep one unit throughout the schedule, such as millimeters or inches.
Have a qualified local professional check dimensions in several positions where necessary, especially when a panel may not be square. Record differences instead of silently averaging them. If the glass is difficult to reach, provide an estimate for budgeting and arrange a professional site measurement before production.
Do not deduct a generic edge clearance or assume that an installation rule from another film brand applies. The required clearance, busbar position, sealant compatibility and cable route depend on the selected product and project details. Confirm these against the supplier’s instructions and the final drawing.
4. Prepare a panel schedule
The example below shows the information to provide. All dimensions are fictional and for quotation explanation only; they are not cutting instructions.
| Panel ID | Type | Width × height | Quantity | Notes |
|---|---|---|---|---|
| A1–A2 | Fixed glass | 900 × 2,100 mm | 2 | Visible glass; each panel checked |
| D1 | Glass door | 800 × 2,000 mm | 1 | Handle and hinge photos attached |
For this example, the nominal rectangular glass area is (0.9 × 2.1 × 2) + (0.8 × 2.0 × 1) = 5.38 m². This is a budgeting reference. It does not determine final film coverage, billable material area or the complete installed cost.
If using inches, a rectangular area in square feet is width × height ÷ 144. Keep the original measurements alongside the calculation so the supplier can check the schedule. See what affects smart film costs for office glass for the other factors in a quote.
5. Flag doors, cutouts and unusual shapes
Include close-up photos of handles, hinges, clamps, holes and other fittings. For shaped panels or proposed partial coverage, send a dimensioned drawing and explain the intended coverage boundary. A bounding rectangle may help with an early estimate, but it is not a sufficient production drawing for an irregular shape.
For doors, ask your local installer and electrician to plan a suitable cable route that accommodates movement. Do not assume that the same connection detail used on a fixed partition will suit a moving door.
6. Add project information beyond dimensions
- Project city, country and delivery destination.
- Existing glass or new glazing, with overall and detail photos.
- Preferred product model, or the appearance and privacy requirement if undecided.
- Which panels should switch together and any proposed control method.
- Available information about power and the planned controller location.
- Required timing and the local team responsible for measurement, installation and electrical work.
Electrical suitability and component selection should be reviewed against the supplier’s requirements by qualified professionals. GlaziVue supplies products and assists with product selection and quotations; the customer arranges local site measurement, installation and electrical work.
7. Confirm the production drawing before ordering
Before approving manufacture, confirm the final dimensions for every piece, orientation, film coverage, connection side, cable details and any agreed cutouts or edge treatment. Make sure the drawing revision matches the order. Keep a written record of what has been approved rather than relying on an unlabeled photo or a total-area estimate.
Once your measurements are recorded, use our PDLC smart film panel layout guide to coordinate panel IDs, seams, connection edges and wire exits. It includes a conceptual P01–P03 panel schedule for preparing your project information.
If the optical appearance is still undecided, evaluate a PDLC smart film sample before committing to the full project.
Include a separate record for every moving door
Alongside width and height, record how each door moves, the hardware locations and the intended switching group. The smart film glass door checklist explains the details to flag. For fixed existing panels, use the office glass retrofit guide to identify glass condition and installation access before requesting a quote.
Frequently asked questions
Can I request a quote with only the total glass area?
You can use an estimated area to start a budgeting discussion, but include panel sizes and quantities as soon as available. Projects with the same total area can have different panel layouts and connection requirements.
Should I measure the frame or the glass?
For a retrofit enquiry, identify the visible glass surface you intend to cover and label that measurement basis. Final film dimensions and clearances require separate confirmation for the selected product.
Can I cut the film to fit after delivery?
Do not assume on-site cutting is allowed. Confirm the supplied format and permitted handling with the supplier before ordering, and approve the required dimensions and connection details in advance.
Ready to request a project quote?
Send your panel schedule, labeled photos, destination and intended use through Submit a Project. If some details are still estimates, mark them clearly so they can be reviewed before production.